
Last updated: October 21, 2026
Quick Answer: For most beginners, beading techniques and project making are easiest to start with stringing or a small peyote sample, and a simple bracelet is often the quickest finished piece. This guide to Beading Techniques and Project Making — The Complete Guide focuses on how to choose the right method for the object you want to make, and how to build it so it holds up.
Beading works best when the technique matches the project, not when the craft drawer is full of random supplies. If the beads are fighting the stringing method, the clasp, or the fabric, the finished piece will twist, gap, or break. This guide to Beading Techniques and Project Making — The Complete Guide gives the practical choices: which techniques suit which projects, what tools actually matter, and where beginners usually go wrong.
A reader trying to make a wearable necklace, a repaired bracelet, or a stitched bead panel does not need theory first. The real question is: which beading technique should I use for the object I want to make, and what must I do so it holds up? For that answer, the guide below compares stringing, loom work, off-loom stitchwork, and beaded embroidery, then shows how to build a project without wasting materials.
I write from a materials-and-construction angle: bead size, hole shape, thread abrasion, tension, and finishing methods matter more than aesthetic trends.
Key takeaways
- Stringing is often the quickest route to jewelry, but it fails when the cord is too thin, the bead holes are sharp, or the clasp is underbuilt.
- Loom beadwork makes even patterns quickly, but it produces a narrower, flatter fabric and is less forgiving when you need curves.
- Off-loom stitches such as peyote, brick stitch, and herringbone are slower at first, then become the most flexible methods for shaping and edging.
- Beaded embroidery gives the most visual freedom, but it demands a stable base fabric and careful planning so the weight does not distort the garment or panel.
- A small strung bracelet or a small peyote sample is a sensible beginner project, while a large necklace or a dense embroidered surface is better left until the basics are comfortable.
- A strong finish matters as much as the pattern: thread path, knot placement, and reinforcement determine whether the piece lasts.
What should I learn first: stringing, loom work, or off-loom stitchwork?
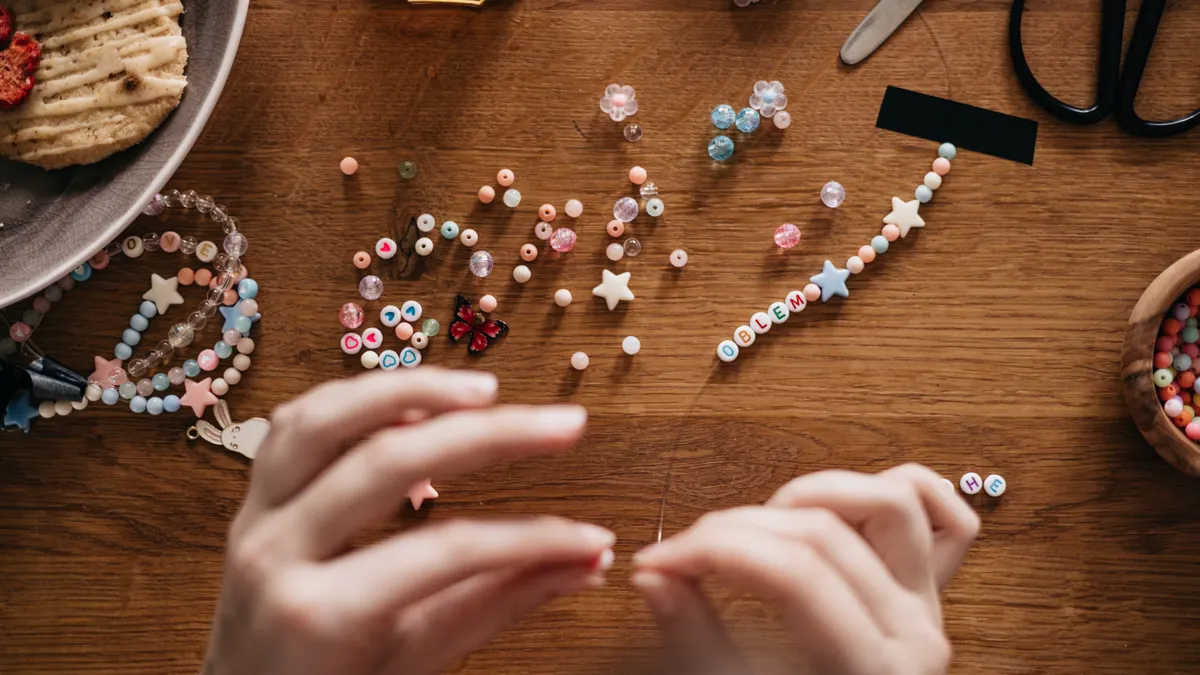
Start with stringing if you want a finished object quickly; start with peyote if you want the most useful foundation for serious beadwork. Stringing teaches bead selection, spacing, clasps, crimps, and basic design balance. Peyote teaches tension control, counting, row structure, and how beadwork behaves as fabric. Loom work sits in the middle: it is efficient for repeating patterns, but the setup can distract a beginner from understanding why the rows behave the way they do.
The fastest beginner win is usually a single-strand bracelet with 6 mm or 8 mm beads, a small clasp, and a cord matched to bead-hole size. That project exposes the core decision points without demanding advanced shaping. If the piece is meant to be daily-wear jewelry, stringing is a practical place to begin because it teaches the finishing details that make or break a wearable item.
Peyote stitch is the better long-term first skill if the goal is to make beadwork that can expand into rings, cuffs, bezels, and components. Even-count peyote and odd-count peyote both rely on consistent thread tension and predictable bead turns, which sounds simple until the rows start shifting. That friction is useful. It forces precision early.
Loom work makes sense when you want straight-edged bands or graphic designs with repeated color blocks. The loom keeps rows aligned, but the result is usually more rectangular and less sculptural than off-loom methods. If the reader wants pendants, curves, or surface shaping, a loom is not the most versatile first tool.
The wrong first choice is any project that combines several new skills at once: for example, a multi-strand necklace with knot covers, bead weaving, and a complicated clasp. That kind of project hides the cause of failure. When it comes apart, you will not know whether the problem was tension, thread, hole size, or hardware.
Stringing beads: when simple construction is the right choice
Stringing wins for wearable basics because it produces a finished piece with the fewest moving parts. The technique is direct: beads go onto a cord, wire, or beading thread, then the ends are secured with crimps, knots, or connectors. For beginners making bracelets and necklaces, that simplicity is a strength, not a compromise. For fit, finish, or medical concerns, consult a professional jeweler or craft specialist if you are unsure about materials or hardware; the Bead & Button community and manufacturer guidance are useful starting points for technique and compatibility checks.
The main advantage is speed. A single-strand design can be assembled in one sitting, and the visual result depends more on bead selection than on advanced hand skills. Rounded beads, pearls, glass rounds, and gemstone strands all suit stringing well. If the design uses a repeating pattern and the holes are clean and consistent, stringing can look polished with very little structural complexity.
The weakness is durability when the hardware and cord are mismatched. Fine beading wire is useful for drape, but it can kink. Soft cord is easy to handle, but it may stretch under weight. If the beads have rough or narrow holes, they can abrade thread and weaken the strand. A project that looks elegant on the table can fail at the clasp if the end finish is careless. That is why stringing is not “easy” in the lazy sense; it is easy only when the construction details are respected.
The best use case is a bracelet, choker, layered necklace, or simple anklet where the design depends on color rhythm rather than structural beadwork. It is also the right method for quick prototypes, gifts, and pieces that need a clean, low-profile finish.
Stringing is the wrong choice for heavy beaded surfaces, sculptural forms, or designs that need tight architectural shaping. It is also a poor choice if the bead holes vary so much that tension cannot be held evenly. In those cases, use a woven method or switch to a sturdier support such as coated beading wire with proper crimp hardware.
For sourcing, stringing materials are widely carried by craft suppliers, jewelry-making stores, and major retailers such as Amazon, Walmart, and Michaels. Check the current listing details for cord diameter, clasp size, and hole compatibility before buying.
When does loom beadwork make sense?
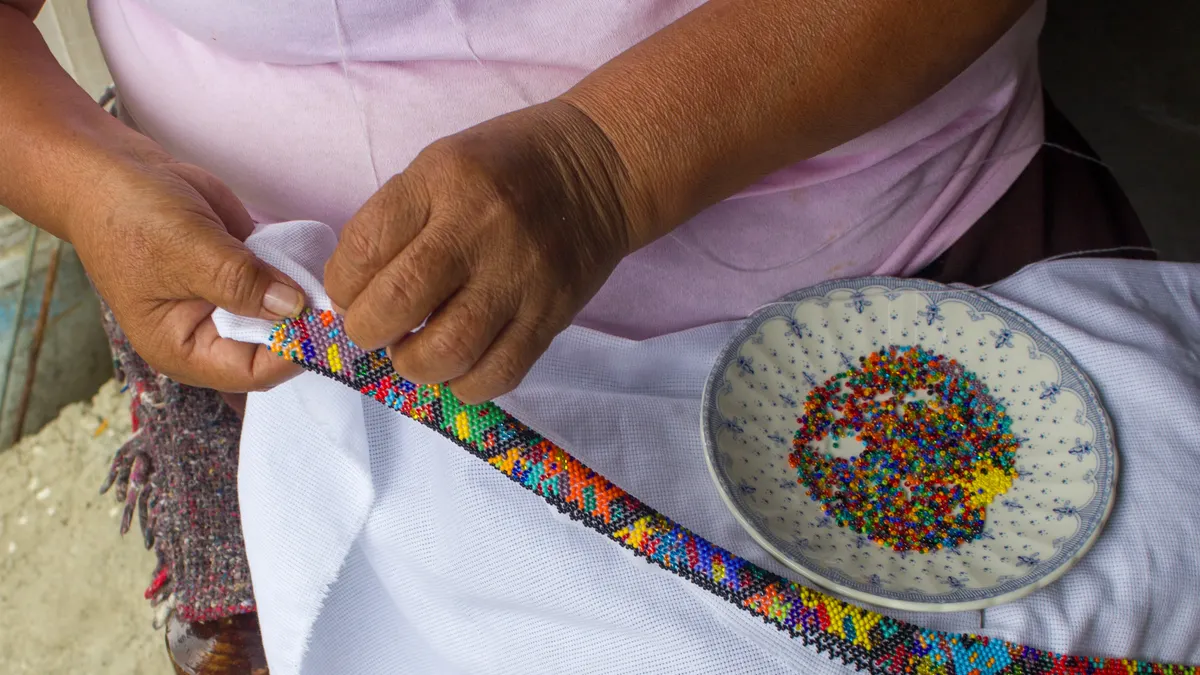
Loom beadwork makes the most sense when the design is flat, graphic, and repeating. A loom holds warp threads under tension so the beads can sit in neat columns and rows. That produces a crisp, woven panel with strong visual alignment. If the project is a bracelet band, bookmark, decorative strip, or geometric panel, the loom is efficient and reliable.
The strength of loom work is speed once the setup is complete. Repeated motifs, stripes, and pixel-style designs build quickly. The technique is especially good when a pattern depends on precise row-by-row color placement. The flat structure also makes it easier to read charts and follow color counts.
The drawback is shape limitation. Loom beadwork tends to be rectangular unless it is cut, tapered, or finished with shaping methods. That means it is less suited to curved cuffs, rounded bezels, or dimensional forms. The warp threads can also create edge management problems if they are not secured cleanly. For safety and finish quality, consult a professional if you are planning a wearable item that must endure strain or abrasion; the Bead & Button community and manufacturer instructions are useful references for warp handling and loom finishing.
Loom work is the right choice for someone who wants a textile-like bead surface and does not mind a setup phase. It is especially useful for pattern-driven makers who enjoy chart reading. It is not the best choice if the goal is a one-off pendant or a strongly sculpted piece. The process rewards consistency more than improvisation.
A practical beginner project is a narrow bracelet band with two or three colors and a simple edge finish. That project teaches the full loom workflow without overwhelming the maker with border shaping. A common beginner mistake is choosing a pattern that is too wide, which makes the tension harder to control and the finishing more awkward.
The loom itself does not have to be elaborate; simple portable looms and desk looms both work. What matters more is the relationship between bead size and warp spacing. Too much slack and the rows drift; too much tension and the fabric can curl or distort.
Off-loom stitching: why peyote, brick stitch, and herringbone matter
Off-loom stitching wins for versatility because it can make tubes, circles, bezels, edges, and freeform shapes that a loom does not handle as elegantly. Peyote stitch, brick stitch, and herringbone are the core methods to learn if the goal is to grow beyond basic strung pieces. They each build bead fabric in a different way, but they share one crucial trait: they turn beadwork into structure.
Peyote stitch is the most useful starting point. It produces a supple fabric and comes in several forms, including even-count, odd-count, tubular, and circular versions. It is widely used for bracelets, rings, bezels, and covers because it is predictable and adaptable. The trade-off is that counting matters. Lose track of the row and the structure can drift quickly, especially when the bead size is inconsistent.
Brick stitch is stronger visually where a staggered, stacked look is wanted. It is a good edging and shaping stitch because it can flare, taper, and curve in ways that feel controlled. Its downside is that it can look “looser” than peyote if the tension is uneven, and beginners sometimes pull it too tightly, which makes the fabric buckle.
Herringbone stitch gives a more braided appearance and a denser hand. It is excellent for tubular forms and elegant ropes, but it can be less forgiving during the learning phase because the pattern of thread travel is less intuitive than peyote. The payoff is a refined texture and a strong vertical rhythm.
Off-loom stitches are not the fastest path to a finished piece, and that is the point. They teach the maker how a bead structure is actually built. Anyone who wants to design original pieces rather than just assemble kits should learn one of these stitches before moving into advanced work.
The best project type here is a narrow cuff, ring, bezel, or a small decorative component that can be completed in a few sessions. A very large off-loom project is where beginners lose patience, then lose tension. Start small and scale after the stitch path becomes automatic.
How do I choose the right thread, cord, and needle?
Choose the support material based on bead-hole size, project weight, and whether the piece needs flexibility or stiffness. The most common mistake is treating thread as a generic supply. It is not. Thread choice controls abrasion resistance, how many passes fit through a bead, and how well the finished piece holds shape.
For seed-bead weaving, nylon or bonded thread in a size that allows repeated passes is usually more useful than a heavy cord. A needle must fit the thread and the bead hole without forcing. If the needle is too thick, it damages the bead or frays the thread path. If it is too fine, threading becomes frustrating and slow. The goal is clean passage, not brute force.
For stringing, beading wire gives structure and a clean drape, while flexible cord gives a softer hand. Wire is better when the piece needs to hang in a straight line or hold heavy beads without sagging. Cord is better for comfort and casual wear, but it must be chosen carefully if the piece will take stress. A bracelet made with stretchy or soft material can feel comfortable at first and then loosen over time.
For embroidery, strong foundation thread and a stable base fabric matter as much as the beads. A surface stitched onto thin fabric can pucker, especially when dense glass beads are used. Backing and stabilization are not optional on heavier work.
Needle size should be chosen for the project, not the maker’s habit. A needle that passes through a bead multiple times without splitting the thread is the practical standard. If a technique requires several thread passes in the same hole, the bead size must support that. Cheap mixed bead lots often fail here because hole sizes vary too much.
The safest rule is this: if a project needs repeated passes, use smaller beads with more uniform holes; if it needs drape and weight, use a support system that can carry that load. That decision is more important than decorative ambition. The Bead & Button community and manufacturer material charts are useful references before you commit to a full project.
How do I start a beading project without wasting materials?
Start with a sample strip, a small countable layout, and a finish plan before you string or stitch the final piece. That order saves materials because it exposes fit problems early. Many bead projects fail not in the middle, but at the ends: the clasp does not sit right, the length is wrong, or the border finishes unevenly.
The first step is to define the finished object in physical terms. Is it a 7-inch bracelet, a 16-inch necklace, a 2-inch pendant, or a 3-inch stitched patch? Those measurements dictate everything else. A bracelet needs a closure allowance. A panel needs edge finishing. A pendant needs a hanging point. Without that decision, bead choices stay vague.
Next, map the pattern or arrangement. For simple stringing, lay out the sequence before threading. For woven work, count the repeats and note any edge treatment. A project that uses 11/0 seed beads, for example, behaves very differently from one using larger 8/0 or 6 mm beads. The bead size changes the visual density, the flexibility, and the number of rows required.
Then choose the finish. Crimps, knots, loops, fringes, bezels, backing, and edge trims are not afterthoughts. They are part of the structure. A good finish plan tells you whether the piece needs a clasp, a sewn-in backing, or a reinforced edge. If the finish is unclear, the project is not ready.
A sample swatch matters for any new stitch or unfamiliar bead size. Even a small test strip reveals whether the tension is too tight, whether the beads line up cleanly, and whether the hole size supports multiple passes. That sample can also show whether the color contrast works in daylight, which is often different from what the tray suggested.
The biggest waste happens when a maker starts with a full project and only later discovers that the beads are too large, the cord is too soft, or the motif is too dense. Small test pieces are not beginner behavior; they are efficient craft behavior.
The honest side-by-side
Stringing wins for speed and wearable simplicity. Off-loom stitching wins for structural flexibility. Loom work wins for patterned flat bands. Beaded embroidery wins for surface decoration. The right method depends on the object, not on what looks most impressive in a tutorial thumbnail.
| Criteria | Stringing | Off-loom stitching | Winner for which condition |
|---|---|---|---|
| Speed to a finished piece | Fastest for a simple bracelet or necklace | Slower because rows must be built stitch by stitch | Stringing for quick wearable projects |
| Structural flexibility | Limited to the support material | High; can form tubes, curves, and bezels | Off-loom stitching for shaped work |
| Pattern control | Moderate; best for repeating strands | High; counts and row structure are precise | Off-loom stitching for complex patterns |
| Beginner ease | Easiest first finish | Steeper learning curve | Stringing for absolute beginners |
| Best use of seed beads | Not the strongest fit | Excellent for 11/0 and similar sizes | Off-loom stitching for seed-bead work |
| Edge and border shaping | Basic only | Strong; especially with brick stitch | Off-loom stitching for borders |
| Weight on the finished piece | Depends on bead and cord choice | Can become heavy in dense forms | Stringing when light wear matters |
| Repairability | Often straightforward if the strand is accessible | Depends on the stitch path and access points | Stringing for easy maintenance |
| Best for sculptural design | Poor fit | Strong fit | Off-loom stitching for original forms |
The table points to the same conclusion: stringing is the right default for quick jewelry, but off-loom stitching is the stronger long-term skill. A generic article would stop there. That misses the practical detail that a quick finish is not the same thing as a good finish. If the cord choice, clasp choice, and bead-hole fit are wrong, the “easy” method becomes the one that fails first.
What project should I make first?
Make a bracelet first if the goal is a clean finish; make a small peyote sample first if the goal is to learn bead construction. A bracelet gives you a wearable result in a short span, usually using a small amount of materials and a single closure system. A sample strip gives you a controlled environment to learn tension and row structure without the pressure of sizing for a wrist or neck.
The best first bracelet is simple: one strand, one repeating pattern, and a clasp that matches the bead weight. Keep the material count low. A project with three bead sizes, fringe, and multiple connectors is not a starter project even if the finished photo looks simple. The more parts it has, the more places it can fail.
The best first stitched project is a small peyote band or rectangular sample using a single bead size. That gives the reader a chance to see whether the rows sit flat and whether the stitch path makes sense in the hands. A small sample is not wasted time; it is the cheapest way to learn whether the technique is being executed correctly.
If the reader wants décor rather than jewelry, a small beaded patch or embroidered motif is a good first project only when the base fabric is stable enough to support the bead weight. Thin cotton or loose weave fabric can pucker under dense stitching, so a stiffer backing may be needed. That extra layer is often ignored in beginner instructions, and it is one of the main reasons surface beading looks good at first but distorts later.
The first project should end in a complete object, not a half-learned technique. A finished, imperfect bracelet teaches more than an abandoned elaborate piece. Completion reveals the full workflow: planning, construction, finishing, and evaluation.
When should I avoid beading this way altogether?
Avoid beadwork with dense or fragile beads when the project needs daily abuse, repeated washing, or high stretch. That is the blunt answer. A beaded surface is decorative structure, not indestructible hardware. If the item must survive rough handling, laundering, or heavy abrasion, the technique may be the wrong tool.
This is especially true for garments, bags, and pieces that will be folded, crushed, or rubbed against hard surfaces. Bead embroidery can snag. Loom bands can fray at the edges. Stringing can stretch or fail at the join if the load is too high. None of those are reasons to avoid beading entirely; they are reasons to choose the method wisely.
Avoid elaborate stitchwork if the maker cannot tolerate counting errors. Peyote and brick stitch reward concentration. A distracted session can create a structural mistake that is annoying to correct later. A person who wants background handwork while watching television should probably start with stringing or a very simple repeated stitch.
Avoid mixed-bead bargain lots when precision matters. Irregular hole sizes and inconsistent shapes make tension difficult to manage, especially in off-loom work. A project can become harder than it should be simply because the beads are not consistent enough for the chosen method.
Avoid ambitious first projects that combine several techniques into one piece. A necklace with woven center panels, stitched fringes, and complex wirework is a design challenge, not a first project. It will teach very little and frustrate very quickly.
For technical standards and broader craft safety habits, the beadworker benefits from checking manufacturer guidance for cord and adhesive compatibility, and from reading professional resources on textile and jewelry assembly from organizations such as the Bead & Button community and the Jewelers of America. Those bodies are useful starting points for technique and material standards, though the specific method still depends on the project.
What is the verdict?
Choose stringing if the goal is a finished bracelet or necklace with the least setup and the fewest stitch skills. Choose off-loom stitching if the goal is beadwork that shapes, curves, or becomes a real woven structure. Neither if the project must withstand harsh wear, repeated laundering, or heavy stress without decorative compromise.
That is the clean call. Stringing gets the fastest result and is the best entry point for wearable basics. Off-loom stitching is the better long-term investment in skill and design range. Loom work is a strong specialist option for flat patterned bands, but it is not the best all-purpose first method. Beaded embroidery belongs where visual surface matters more than durability.
The mistake to avoid is treating all beadwork as interchangeable. It is not. A 7-inch bracelet, a tubular ring, a 2-inch pendant, and a stitched garment panel all ask for different construction choices. The right technique is the one that matches the object, the wear pattern, and the maker’s current skill level.
Drafted with AI; not yet reviewed by a person.



Leave a Reply