
Last updated: October 30, 2026
Key Takeaways
- Keep frequently used parts together and separate the ones that can damage or tangle.
- Start with color, then narrow by size or material if bins get crowded.
- Organize bead findings by type and size, not by color.
- Labels and dividers prevent a neat setup from turning into guesswork.
A bead storage system for How to Organize and Store Beads, Findings, and Tools works best when it keeps small parts visible, sorted, and closed up in a way you can maintain after the first cleanup. Quick answer: use three zones, label everything, and keep reset time under 10 minutes. In short: use separate containers for beads, findings, and tools; label everything; and choose a layout you can put back in under 10 minutes. That is the difference between a tidy drawer and a system you will actually keep using.
The goal is not to make every container look perfect. The goal is to stop mixed beads from wandering, keep jump rings and clasps from disappearing, and let you reach for wire cutters, round-nose pliers, and crimp beads without emptying a whole box onto the table. If you do a lot of stringing, wire work, or mixed-media projects, the right setup saves time every session. For a broader materials overview, see the beading basics and supplies guide.
Start with a storage layout that matches how you work

A good layout keeps the parts you use together and separates the parts that hate each other. If your beads live in one corner, findings in another, and tools in a third, you will waste less time hunting and less time re-sorting.
The simplest setup is three zones:
- Beads: sorted by color, size, or project.
- Findings: sorted by type, such as jump rings, ear wires, clasps, head pins, eye pins, and crimp tubes.
- Tools: stored upright or flat where handles and jaws stay protected.
A small table, rolling cart, or drawer unit works better than a giant craft closet if you actually sit down and make pieces. A compact system is easier to keep tidy because you can reach everything from one chair. If you work on the road or at a class, a portable bead organizer with a handle may matter more than a big storage case. For workspace setup ideas, the beading workspace setup page can help.
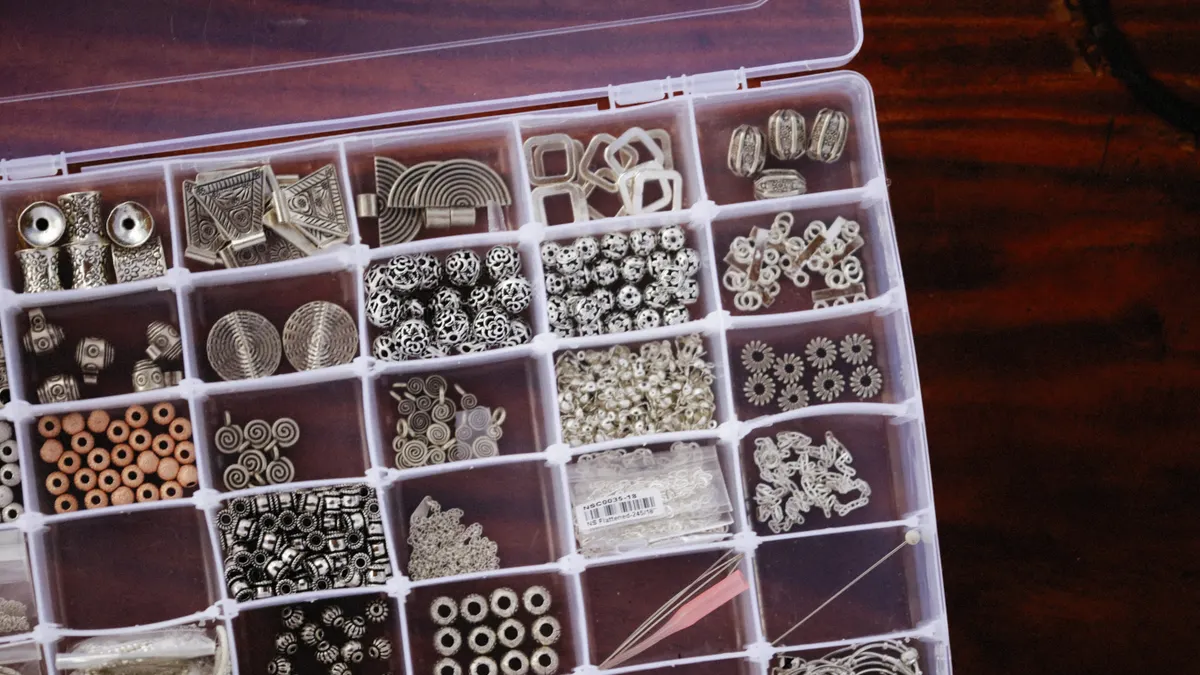
The right layout also depends on volume. A few dozen colors fit in a craft box with dividers. A larger stash may need stackable storage boxes, small jars, and zip bags inside a drawer cabinet. The trick is to give every category a fixed home. If one style of bead keeps ending up in a random tray, it does not have a system yet.
This is the point where many crafters overbuild. They buy a giant organizer with 40 tiny sections, then discover that half the compartments stay empty while the rest become junk drawers. A better choice is a container that fits your actual inventory with a little room to grow, not one that looks impressive on day one.
If you want a foundation for supplies beyond storage, the hub on beading basics and supplies can sit beside this page. It belongs in the same planning stack, even though the storage job is its own problem.
How do you sort beads so they stop mixing?
Sort beads by color first, then by size or material if the color bins still feel crowded. That order is often the fastest visual method, but it is not always the most functional method. If you frequently make repeated designs, size sorting may matter more than color sorting. If you sell jewelry, you may want both.
Here is a practical sorting workflow:
- Empty one type of bead at a time onto a tray with a lip or a shallow baking pan. The raised edge keeps round beads from rolling off the table.
- Group by broad color family first: white, black, red, blue, green, metallic, and clear. You do not need perfect color theory here; you need fast visual sorting.
- Within each color family, split by size if the mix is wide. A 3 mm seed bead and an 8 mm round bead do not belong in the same slot if you want to find anything later.
- If the color and size still leave a crowded pile, separate by material or shape, such as glass, gemstone, seed bead, cube, rondelle, or spacer. That keeps similar-looking pieces from becoming a single mystery bin.
- Put each group into a lidded compartment, small jar, or labeled zip bag. The result should be a container that opens, shows one category, and closes without spilling into the next category.
A lot of people start by sorting everything into one huge rainbow display. That looks beautiful for a week and then gets annoying when you need one specific strand. Color sorting is the fastest visual method, but it is not always the most functional method. If you frequently make repeated designs, size sorting may matter more than color sorting. If you sell jewelry, you may want both.
Transparent storage boxes are useful here because you can see the contents without opening every lid. Clear jars work too, especially for larger rounds or spacer beads. Zip bags are less pretty, but they are cheap, flexible, and useful for overflow. The trade-off is that bags crease, tip, and can make tiny labels harder to read. For fragile finishes, rigid compartments protect better than loose bags.
For one-off project mixes, keep the leftover components together in one section instead of returning each piece to its original family every time. A labeled project bag is often better than a perfect permanent sort because it lets you resume work without rebuilding the kit. For project-specific storage, see the project bead kits page.
What is the best way to organize bead findings?
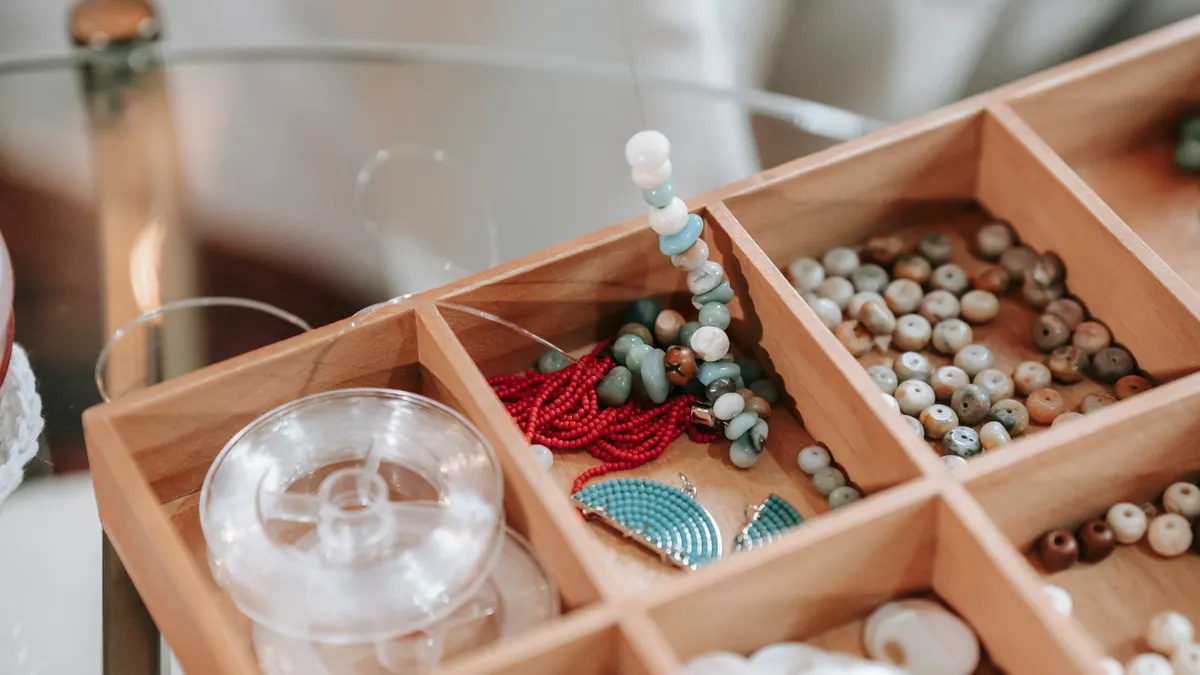
A functional bead findings setup usually works better by type and size than by color. Findings are tiny, easy to miscount, and usually chosen for compatibility, so a practical sort saves more time than a decorative one.
Use separate containers for the main categories:
- Jump rings: split by diameter and wire gauge if you use several sizes.
- Ear wires: keep pairs together and upright if possible.
- Clasps: sort by type, such as lobster clasp, toggle, magnetic clasp, or spring ring.
- Head pins and eye pins: keep straight pieces flat so they do not bend into a tangled nest.
- Crimp tubes, crimps, and covers: store in one compartment with enough labeling to tell them apart.
- Spacers, bead caps, and charms: separate by shape and size if they all look alike in a heap.
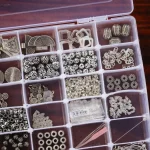
Small jars are useful for findings that vanish quickly, especially jump rings and crimp beads. A bead organizer with 10 to 20 divided compartments can work well for a working set. For larger inventories, storage boxes with removable dividers let you resize slots as your collection changes.
Label the lid and the front edge if the container lives in a drawer. One label is not enough when the box is stacked or half-closed. Use plain text that names the part and, when useful, the size: “Jump rings 4 mm,” “Head pins 24 gauge,” “Ear wires sterling silver.” That reduces mistakes when you are in a hurry.
The biggest mistake with findings is mixing “similar enough” parts. A clasp in the wrong size can ruin a project at the last minute, and a jump ring that is too small or too thick can slow you down while you sort through five nearly identical piles. Keep the parts you use together, but do not let similar pieces share a compartment just because they fit.
If you make multiple styles, assign one compartment row per project type. That way, the findings for a necklace kit do not drift into the earring bin. A fixed home matters more than a pretty category tree. For tool and supply pairings, the wire wrapping tools guide is a useful companion.
Labels and dividers that keep a system usable
Labels and dividers are what stop a neat arrangement from becoming a guessing game. Without them, the system looks organized until the third time you need the same container and cannot remember which slot held what.
Use labels at three levels:
- Container label: the outside name, such as “Seed beads,” “Findings,” or “WIP projects.”
- Compartment label: the internal category, such as “Blue glass 8/0” or “Crimp tubes.”
- Project label: the work-in-progress name, date, or client if you keep active pieces separate.
A simple label maker is helpful, but plain masking tape and a permanent pen work fine. The important part is legibility. Tiny handwritten notes tend to fade or smudge. If your setup lives in a humid craft room or a garage, moisture-resistant labels are worth the extra care.
Dividers do the heavy lifting inside storage boxes and bead organizers. Adjustable dividers let you resize compartments when a category grows. Fixed compartments are better for tiny pieces that would spill into each other if the walls moved. If you buy only one style, choose removable dividers first. They are more forgiving when your stash changes.
This is also the best place to solve the “new bead, no home” problem. Leave one or two blank compartments in each main box. That small amount of empty space is more useful than packing every slot full. It gives you room for new colors, one-off purchases, and the few leftovers that always appear after a project.
A common mistake is labeling only by color. “Blue” seems obvious until you have opaque blue seed beads, translucent blue glass drops, and blue-lined crystal in the same drawer. A more useful label combines color with size, material, or shape. Two words beat one vague word every time.
For writers and sellers, dated project labels also help with repeat orders. If a style comes back six months later, the old component set is much easier to rebuild when the container tells you what it was used for. That is not glamorous, but it saves real time.
How to store tools without damaging them
Store tools so the jaws stay aligned, the handles stay comfortable, and the metal does not bang into other metal. That usually means giving pliers, cutters, tweezers, and scissors their own space instead of tossing them into the same box as loose findings.
A tool roll, shallow drawer, or upright caddy can all work. The right choice depends on how often you move them. If you travel to classes or shows, a zippered tool case with pockets protects edges better than an open tray. If your tools stay on one bench, a drawer insert or magnetic strip can keep them within reach.
Keep these basics separate:
- Cutters: side cutters or flush cutters should not rub against hard metal parts.
- Pliers: round-nose, chain-nose, and flat-nose pliers stay easier to grab if each has a marked slot.
- Measuring tools: rulers, calipers, and bead mats belong where they do not get bent.
- Needles and awls: store in a narrow case or tube so they do not poke through soft storage.
- Small extras: glue applicators, thread conditioners, bead stoppers, and thread burners need a separate pouch or tray.
A 12-inch drawer organizer can hold a useful working set, but the point is not the dimension. The point is that the tools should come out and go back in without snagging each other. If your pliers clack together every time you close the drawer, add a liner or split them into individual slots.
The major trade-off is accessibility versus protection. Open storage is faster. Closed storage protects edges and keeps dust off. If a tool is used every hour, open access makes sense. If it is a specialty tool used once a month, closed storage is safer.
Do not store tools loose in the same box as beads. It seems efficient until a cutter edge scratches a compartment lid or a pointed awl finds its way into a bag. That kind of collision is small at first and expensive later, because bent tips and nicked edges shorten the useful life of the tool. For care and replacement timing, see the beading tools care guide.
Travel storage for classes, retreats, and small workspaces
Travel storage works best when it holds one project, not your whole collection. A portable kit should carry only the colors, findings, and tools you need for the next session, because a smaller load is easier to protect and faster to reset.
Use a compact bead organizer with locking lids, a zippered pouch, or a hard-sided box with dividers. For tiny components, small jars or screw-top containers are safer than loose packets. For flat items like needles, patterns, or thread cards, a slim envelope or pocket folder keeps them from bending.
A good travel kit usually has four parts:
- one compartment for the active project beads,
- one compartment for spare findings,
- one pouch for essential tools,
- one labeled space for finished pieces or partial work.
If you carry mixed supplies to a class, pack by task instead of by stash. Bring the exact colors and parts needed for that project. That lowers the chance of opening the box and dropping everything into a shared tray. A half-pound of extra material can feel harmless until you are trying to work on a small cafe table.
Travel storage is not ideal for long-term sorting. It is too easy for a moving container to blur the system. Use it as a working kit, then return the contents to your main storage at home. If you skip that reset for more than a few sessions, your travel box becomes the new junk drawer.
One practical rule helps here: if a part would be annoying to replace, give it a rigid container. A clasp that costs time to hunt down belongs in a box or jar, not in a loose pouch. The same goes for specialty pliers, precision tweezers, and delicate needles. Soft bags are fine for overflow; they are poor protection for anything sharp, small, or expensive to replace. For portable setups, the travel bead organizer page is a useful next step.
Reset your storage routine so it stays useful
A storage system stays useful when reset day is short and repeatable. If you can put away leftovers in 10 minutes after a session, the system is realistic. If reset takes an hour, you will start skipping it.
Use this cleanup order:
- Return unused beads to the correct color or size compartment first.
- Put findings back before you close the boxes, because tiny parts are easiest to misplace.
- Wipe dust or debris from trays and lids with a dry cloth.
- Check labels for fading or peeled corners once a month.
- Move project leftovers into a “current work” box if you are not finished yet.
Keep one “miscellaneous” compartment only if it has a purpose and a deadline. The problem with a permanent misc bin is that it collects everything that does not feel urgent. After a while, it becomes a landfill for almost-sorted pieces. A better choice is a short-term overflow tray that gets emptied on a schedule.
A second honest limit: no storage system fixes an overbought stash. If you own far more supplies than your projects require, even excellent organizers will start to fail. At that point, trim duplicates, combine partial packs, and decide what earns shelf space. That is less about tidiness and more about usability.
The strongest bead storage system is not the one that looks most impressive; it is the one you can reset, understand, and keep using. If you want a deeper planning framework, the craft storage system guide shows how bead storage fits into a wider studio routine.
Drafted with AI; not yet reviewed by a person.


Leave a Reply