

Last updated: October 30, 2026
Quick Answer: bead sizing tells you the outside diameter, while hole size tells you what cord, wire, or needle can pass through it. If you can read both numbers correctly, you can match beads to a project before you buy, instead of discovering too late that a 4 mm bead will not fit a 0.8 mm wire or that a seed bead hole is too tight for your thread.
What bead sizing actually tells you
How to Read Bead Sizes and Hole Sizes starts with two different measurements: the bead’s outside measurement and the size of the hole through the center. Those are not the same, and confusing them can lead to a strand that does not work.
A bead size chart usually lists the outside size in millimeters, such as 2 mm, 6 mm, or 10 mm. That number describes the bead’s widest point, not the hole. A round 8 mm bead and a donut-shaped 8 mm bead can have very different hole behavior even though the outside size matches.
Hole size is usually given in millimeters too, but it is often less prominently printed. A hole described as 1 mm means the opening is about 1 millimeter across. That sounds small until you try to pass a doubled thread, a thicker cord, or a flexible needle through it.
For seed beads, the label often includes both a number system and a size in millimeters. A label like 11/0 is a seed bead sizing convention, not a direct mm size. The actual outside size can vary by manufacturer and by bead shape, which is why a chart based only on 11/0 can mislead you.
The practical rule is simple: outside size tells you the look of the bead; hole size tells you what it can be strung on. If a chart only gives one of those numbers, it is incomplete for project planning.
For a broader overview of supplies and terminology, the hub page on beading basics and supplies can sit beside this guide.
How do I read a bead size chart?
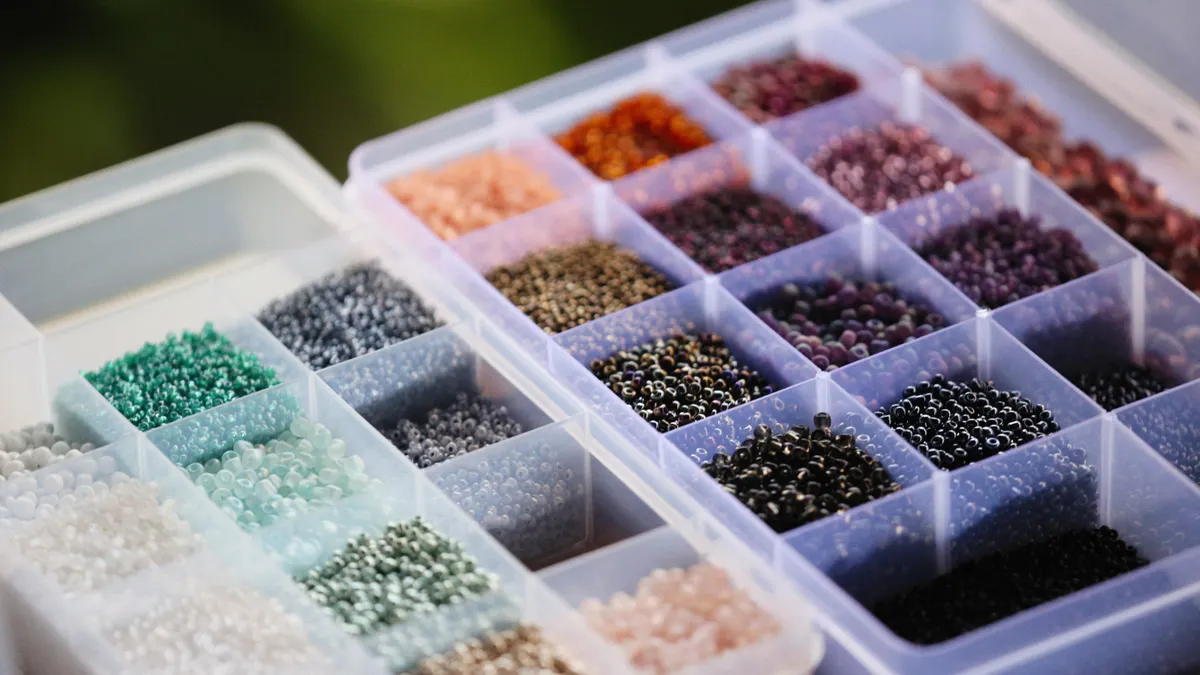
You read a bead size chart by matching the bead’s outside diameter and hole opening to the materials your project actually uses. Start with the unit, then the measurement, then the fit.
A useful chart may include millimeters, seed bead sizing such as 11/0 or 8/0, and sometimes a note like “fits up to 0.8 mm cord.” That last line matters more than the name of the bead. A 6 mm bead with a 0.8 mm hole can work beautifully on silk or fine wire and fail on thicker cord.
Here is the core procedure I use to interpret a chart before buying:
- Find the bead’s outside size in millimeters, such as 4 mm, 6 mm, or 10 mm. That gives the visible scale of the finished piece.
- Look for the hole size, also in millimeters if it is listed. A 1 mm hole is roomy for many stringing materials; a 0.5 mm hole is much stricter.
- Check whether the chart uses a seed bead number system such as 15/0, 11/0, or 8/0. Treat that as a category, not a precise physical measurement; if you are unsure, consult a bead supplier or another professional source, and check an authoritative size guide such as the Miyuki bead size chart.
- Compare the hole size with the actual diameter of your cord, thread, wire, or needle eye. The material must pass through cleanly without forcing.
- Allow for more than one pass if your design needs it. A bead that fits once may not fit twice, which matters for peyote stitch, fringe, and wrapped links.
The last step is where many projects break down. A chart may say a bead fits thread, but if the pattern needs two passes, the hole needs more room than the label suggests. A bead that barely accepts one strand can become useless in a stitched piece.
A good chart also tells you what standard it uses. Millimeters are the clearest measurement for most shopping, because they convert directly to the tools on your bench. If a listing mixes inches, “approximate,” and seed bead terms without a clear mm number, consult a professional or another reliable source before buying, and compare the listing against a measured size reference such as Fire Mountain Gems’ bead size chart.
Millimeters: the easiest way to compare beads
Millimeters are the easiest way to compare beads because they let you judge size without translating between bead families. A 3 mm bead is small, a 10 mm bead is visibly larger, and the difference is immediate.
Outside diameter in millimeters is usually the most useful number for shopping. If you want a necklace with a tight, delicate look, 2 mm to 4 mm beads create a much finer line than 8 mm or 10 mm beads. That is a visual choice, not just a technical one.
The hole measurement in millimeters is the number that protects the project. A 1.5 mm hole can be generous for elastic, braid, or multiple thread passes. A 0.8 mm hole may work for a single strand of fine thread but become tight the moment you add a crimp cover, knot, or second pass.
Millimeter measurements also let you compare styles that do not belong to the same family. A 6 mm round bead, a 6 mm cube, and a 6 mm faceted bead may not behave alike, but the mm size at least puts them in the same visual range. That is useful when you are matching accent beads to focal beads.
The limit of mm sizing is that it does not tell the whole story. Two beads can both be labeled 8 mm and still behave differently because one is slightly flattened, one has a narrow hole, and one has a longer body. That is why mm is the starting point, not the finish line.
If the listing gives dimensions like 8 x 6 mm, read the first number as the longest measurement and the second as the shorter one. Those shapes are common in bicones, ovals, and cylinders. For round beads, one number is usually enough.
Seed bead sizing: what 11/0 and 8/0 mean

Seed bead sizing uses a numbering system such as 15/0, 11/0, 8/0, and 6/0 to describe relative size, not an exact millimeter measurement. A larger first number does not mean a larger bead; it usually means the bead is smaller.
That is the point that trips up most readers. In seed beads, 15/0 is smaller than 11/0, and 11/0 is smaller than 8/0. The /0 system is historical and widely used, but it is not as precise as a mm chart.
For many projects, it helps to treat these sizes as a range of visual scale and to verify the exact fit with a supplier or professional source if the project is critical. For example, 15/0 beads are tiny and suited to fine detail. 11/0 seed beads are a common middle size. 8/0 beads are noticeably larger and easier to handle when you want texture or faster coverage.
The hole size can vary within the same seed bead label. An 11/0 bead from one maker may take a fine beading needle and thin thread easily, while another batch may have a narrower hole or more irregular shape. That is normal enough that pattern makers often recommend checking the specific brand used in the instructions.
This is where the bead mandrel sometimes matters for shaping and sizing checks. If a project uses shaped components or rings made around a mandrel, the seed beads need enough hole room and enough consistency to sit evenly. A mismatch shows up fast in the finished curve.
Seed bead sizing is not the place to guess. If a pattern says 11/0, use that as the baseline and then compare the hole against the thread or needle you plan to use. If the project depends on a tight, even stitch, a chart based only on bead count is not enough.
Hole size is the number that decides compatibility
Hole size is the number that decides whether a bead will actually work with your thread, wire, or needle. Outside size can look perfect and still fail if the hole is too small.
Compatibility starts with the material, not the bead. A 0.4 mm thread can pass through many small holes that would stop a 0.8 mm cord. A flexible beading needle can help, but it cannot force a hole that is too narrow for the material or for two passes.
This matters most in projects that rely on repeated threading. Stringing a single strand through a 1 mm hole is easy. Running that same bead through a second pass, adding a knot, or using a bead cap changes the equation. The hole must accommodate the thickest point, not just the bare cord.
For wire work, hole size needs extra attention. Soft wire can flatten slightly, but that does not solve a hole that is already too tight. If the project calls for a 20-gauge wire and the bead hole is narrow, you may need a larger hole or a finer wire. Gauge charts help, but the bead’s actual hole is the final judge.
The same logic applies to rosary beads, which often have specific hole and fit requirements because the parts need to stack cleanly and hang straight. If the center hole is too narrow, the assembly can bind or sit crooked.
Do not read “fits standard thread” as a universal promise. Standard is not a measurement. A hole size in millimeters is more useful than a vague fit claim, especially when the project uses multiple passes or thicker components.
A simple compatibility check before you buy
A simple compatibility check before you buy is to compare three numbers: bead outside size, hole size, and the diameter of your material. That can take under a minute and is worth checking before a purchase.
Start with your project materials. If you know the thread, cord, wire, or needle you plan to use, write down its size in millimeters or its gauge. Then compare that to the bead hole size, not just the bead’s outside diameter.
If your project uses seed beads, check whether the pattern calls for one pass or several. A 2-drop stitch, loom work, and some woven patterns often need more room than plain stringing. A bead that fits once may jam the second time through.
If your project uses a bead mandrel or a rigid form, test the bead shape against the intended spacing. A round 6 mm bead and a cylindrical 6 mm bead may share the same nominal size but behave differently in a pattern that depends on even seating.
Here is the fast checklist I would use:
- Outside size: does the bead match the look you want, such as 4 mm, 6 mm, or 10 mm?
- Hole size: is the opening large enough for the thickest part of your material?
- Pass count: does your pattern need one pass or more than one?
- Material type: is it thread, cord, wire, or elastic?
- Shape fit: will the bead sit correctly in the layout, or will its shape distort the line?
A chart can answer the first two items, but the project decides the rest. That is why compatibility is more useful than size alone.
Common mistakes that waste time and beads
The most common mistake is buying by bead size alone and ignoring the hole. That costs time, because the strand stalls mid-project, and it costs money because the beads may not be usable for the pattern you planned.
A second mistake is trusting the seed bead number as if it were a precise measurement. An 11/0 bead from one source can behave differently from an 11/0 bead from another. The cost is usually a mismatch in stitch tension or an uneven finished surface. The fix is to compare the actual millimeter hole size whenever it is available.
A third mistake is forgetting that multiple passes need more room than single-pass stringing. A bead with a 0.8 mm hole may be fine for one strand and fail for two. The fix is to plan for the thickest point, not the easiest one.
A fourth mistake is reading one dimension as if it described every shape. A 6 x 4 mm bead is not the same as a 6 mm round bead. If the shape matters, read the full dimensions, not just the first number.
A fifth mistake is assuming a hole that fits today will still fit after knots, crimp tubes, or folded ends are added. Those details take up room. If the hole is already tight, the project will feel cramped from the start.
A bead size chart is most useful when it is treated as a fit check, not a promise. For a final decision, compare the chart with your materials or ask a bead supplier for guidance before you buy.
Which measurements matter most for your project?
The measurement that matters most depends on how the piece is built, but hole size is the first number to trust when fit is uncertain. If the hole is wrong, the bead is wrong for the job even when the outside size looks perfect.
For stringing projects, outside diameter helps you control visual scale. If you want a bracelet with a light, airy look, 3 mm to 4 mm beads will read very differently from 8 mm beads. For the same project, hole size still matters, but the outer size drives the design more strongly.
For stitched projects, hole size often matters more than outside size. In peyote, brick stitch, and similar structures, a bead that is a little off in outside size can still work if the holes are consistent. A bead with a hole that is too tight can stop the whole row.
For projects involving wire, hole size and shape both matter. Wire does not compress the way thread does, and a bead that is technically large enough may still be annoying to thread if the entry is rough or narrow.
The honest limitation of bead sizing is that it does not replace a sample. A chart gets you close, but a project with tight tolerances may still need one test bead or a small sample run. That is not a flaw in the chart; it is the nature of handmade work.
If you remember only one rule, make it this: read bead size for appearance and hole size for function. When those two match your material, the rest of the project becomes much easier.
Key takeaways
- Bead size usually means outside diameter; hole size is a separate measurement.
- Millimeters are the clearest way to compare beads across styles and sellers.
- Seed bead labels like 11/0 describe category, not a precise
Drafted with AI; not yet reviewed by a person.

Leave a Reply